
Page 36 - Photoshop User January 2017
P. 36
HOW TO ››
Step Four: Zoom in close to the image by holding down the Command (PC: Ctrl) key and tapping the Plus (+) key. Reduce the brush size with the Left Bracket key ([) and carefully trace along the edge of the model’s dress to remove the rest of the visible chair. If you acci- dentally paint away any of the model, press X to switch the Foreground color to white, and paint those areas back in. Once you’re satisfied with the com- posite, create a merged layer by hold- ing down the Option (PC: Alt) key and going to Layer>Merge Visible. Double- click the name of the merged layer and rename it “Merge.”
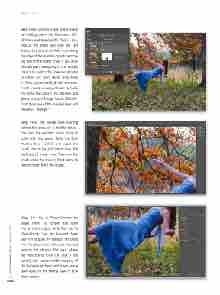
Step Five: The power lines running behind the trees are a terrible distrac- tion from the aesthetic we’re trying to build with this piece. Grab the Spot Healing Brush tool (J) and adjust the brush size to be just larger than the thickness of those lines. Then run the brush along the lines in short spans to remove them from the image.
Step Six: Go to Filter>Convert for Smart Filters to convert the layer into a smart object, and then go to Filter>Liquify. Use the Forward Warp tool (W) to push the folds of her dress into the space where the chair was and remove the obvious flat spot where she was sitting. Click OK. (Tip: If the Liquefy tool creates visible warping of the background trees and leaves, use a layer mask on the Merge layer to hide those areas.)
036
› › photoshop user › january 2017
