
Page 88 - Photoshop User February 2017
P. 88
HOW TO ››
With Center Columns checked, the columns are once again centered in the layout but we now have areas with no set columns on the left and right sides. This might be useful for a text-styled poster image, such as top-left example.
LET’S ADD ROWS
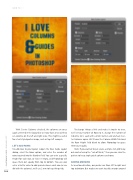
To add rows to your layout, reopen the New Guide Layout dialog, select the Rows option, and enter the number of rows required into the Number field. You can enter a specific Height for each row, or leave it empty, and Photoshop will space them out equally from top to bottom. You can also enter a Gutter value to add space between each row (as we did with the columns); we’ll use 2 mm to keep things tidy.
To change things a little and make it simpler to view, we’ll set our number of Rows to 3; change the number of Columns to 3, each with a 2mm Gutter; and uncheck Cen- ter Columns again. We’ll leave the Column Width field and the Row Height field blank to allow Photoshop to space them out equally.
Note: If you wanted to just create a simple 3x3 grid to lay out content using the “rule of thirds,” then you can clear the gutters to keep single guide columns and rows.
ADDING MARGINS
As mentioned before, our guides run from left to right and top to bottom. But maybe we want to add a margin around
088
› › photoshop user › february 2017
