
Page 42 - Photoshop User December 2016
P. 42
HOW TO ››
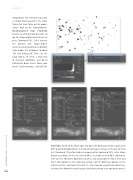
Step Seven: The next task is to create a custom brush to paint in the snow- flakes that have fallen on the model. Switch back to the FallingSnowOn- BlackBackground image. Photoshop brushes need to be black on white, so go to Image>Adjustments>Invert or press Command-I (PC: Ctrl-I). Increase the contrast with Image > Adjust- ments>Levels by pulling the rightmost slider below the histogram to about 183 and clicking OK. Then, use the Lasso tool (L) to select a small area of clustered snowflakes, and go to Edit>Define Brush Preset. Name your brush “Scattered Snow,” and click OK.
Step Eight: Switch to the Brush tool, and open the Brush panel with a quick press of F5 or go to Window>Brush. In the Brush Tip Shape settings, set the Size to 35 px (set it to around 175 px for a high-res image) and the Spacing to 10%. In the Shape Dynamics settings, set the Size Jitter to 44%, the Angle Jitter to 98%, Roundness Jitter to 35%, Minimum Roundness to 25%, and check both the Flip X Jitter and Flip Y Jitter options. In the Scattering settings, click the Both Axes option, set the Scatter to 134%, and Count Jitter to 21%. (Tip: Consider using the New Brush Pre- set icon at the foot of the panel to save all of these settings in a single brush preset.)
042
› › photoshop user › december 2016
