
Page 44 - Photoshop User December 2016
P. 44
HOW TO ››
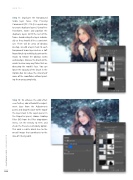
Step 11: Duplicate the Foreground Snow layer twice. (Tip: Pressing Command-J [PC: Ctrl-J] is a quick way to create duplicate layers.) Using Free Transform, rotate and position the duplicate layers to fill the rest of the frame. Avoid scaling the layers individu- ally as they should all be a consistent size. There will be areas of obvious overlap, so add a layer mask to each Foreground Snow layer and use a Soft Round brush tip with black paint on the masks to remove the obvious seams and overlaps. Also use the brush on the masks to clear away any flakes that are obscuring the model’s face. You can lower the Opacity of the brush in the Options Bar to reduce the intensity of some of the snowflakes without paint- ing them away completely.
Step 12: To enhance the cold effect even further, add a Photo Filter adjust- ment layer from the Adjustments panel, and drag this layer to the top of the layer stack in the Layers panel. In the Properties panel, choose Cooling Filter (80) from the Filter drop-down menu. Set the Density to 16% and check the Preserve Luminosity option. This adds a subtle bluish hue to the overall image that contributes to the idea of it being cold.
044
› › photoshop user › december 2016
