
Page 69 - Photoshop User March 2017
P. 69
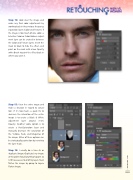
Step 14: Look over the image and make any final color adjustments by working back in the previous frequency separation layers (Color and Texture). If the image is too much of one color, a Selective Color or Color Balance adjust- ment layer can be created in between the Color and Texture layers. Invert the mask to black to hide the effect, and paint on the mask with a low Opacity, white Brush to paint the effect back in where you want it.
Step 15: View the entire image and make a decision in regard to satura- tion. If it’s too much, a quick fix to decrease the saturation of the entire image is to create a Black & White adjustment layer around 3–4% Opacity. Another viable option is to create a Hue/Saturation layer and manually decrease the saturation of the Yellows, Reds, and Magentas of the image. Either of these options can be strategically painted on by inverting the layer mask.
Step 16: I usually do a Save As or duplicate (Image>Duplicate) my image at this point should anything happen so I still have access to all of my layers. Next, flatten the image by going to Layer> Flatten Image.
[069]
> KELBY ONE.COM
