
Page 26 - Photoshop User March 2017
P. 26
››HOWTO
Step 11
Step 10: Near the top of the Layers panel, set the layer’s blend mode to Linear Burn. This essen- tially makes the texture grain the white base of the subject image, allowing the color and grain of the texture to show in the light areas and darken the contrast of the darker areas.
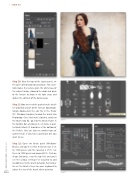
Step 11: Now we need the spatter brush, which I’ve provided as part of the exercise downloads. Simply double-click the .abr file in the Finder (PC: Windows Explorer) to load the brush into Photoshop. Once the brush is loaded, switch to the Brush tool (B), go into the Brush Picker in the Options Bar, and locate it—its name is Spat- ter Brush March (it should be at the bottom of the Picker). You can also use another type of spatter brush, if you have a particular one you want to use.
Step 12: Open the Brush panel (Window> Brush), and you’ll see that the brush Size is set to 1300 pixels and the Spacing is 25%. Set these to 1500 pixels and around 30%. Click on Shape Dynamics, near the top left, and you’ll see the various settings I’ve included to add randomness to the brush behavior. Remember to use the Bracket keys on your keyboard to adjust the size of the brush when painting.
Step 12
[026]
> PHOTOSHOP USER > MARCH 2017
