
Page 26 - Photoshop User January 2017
P. 26
HOW TO ››
Step Four
Step Four: Back in the main design file that we created in Step Two, open the Layers panel (Window>Layers) and click the Cre- ate a New Layer icon at the bottom of the panel. We need to fill this layer with a base color. Press Shift-Delete (PC: Shift-Backspace) to open the Fill dialog, and select 50% Gray in the Contents drop-down menu. Leave the Mode set to Normal and the Opacity at 100%, and click OK.
Step Five: Click on the ƒx icon at the bot- tom of the Layers panel and choose Pattern Overlay. Click on the Pattern thumbnail to open the Pattern Picker, and locate your newly defined pattern, which will usually be at the bottom of the list. Once the pattern is selected, set the Opacity to 50% and the Scale to 20%. These settings will vary with different patterns so feel free to play with different scenarios. Don’t click OK just yet.
Step Six: Click On Blending Options at the top of the list on the left side of the Layer Style dialog. Then, under Advanced Blend- ing, set the Fill Opacity to 0%. This will make the gray base fill invisible, leaving just the pattern. Now click OK.
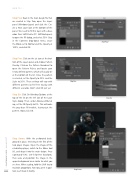
Step Seven: With the perforated back- ground in place, let’s bring in the first of the two player images. Open the image of the celebrating player, switch to the Move tool (V), and drag it into the main design. Press Command-T (PC: Ctrl-T) for Free Transform, then scale and position the image in the upper background area similar to what you see here. When scaling, hold the Shift key to maintain proportions. For now, get it in posi-
Step Five
Step Six
Step Seven
026 tion; we’ll mask it shortly.
› › photoshop user › january 2017
