
Page 25 - Photoshop User January 2017
P. 25
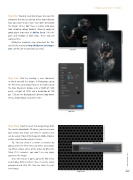
Step One: You only need two images to create this composite but you can add up to five depending on how you want to lay it out—just don’t overcrowd the design. Since I don’t have a relative who plays high school or college football, I found a couple of good player shots over at Adobe Stock. I like the pose and emotion in both shots. These two will work just fine.
[KelbyOne members may download the files used in this tutorial at http://kelbyone.com/maga- zine. All files are for personal use only.]
Step Two: Start by creating a new document in which to build the design. In Photoshop, go to the File menu and choose New. In the right side of the New Document dialog, enter a Width of 1200 pixels, a Height of 1500, and a Resolution of 100 ppi. Click on the Background Contents drop-down menu, choose Black, and click Create.
Step Three: Open the perf_texture.jpg image from the exercise downloads. Of course, you can use your own texture but make sure that it’s seamless so it can be scaled. I found this image on Adobe Stock as well by searching for seamless texture.
Tip: You can check if a texture is seamless by going under the Filter menu to Other and choos- ing Offset. Adjust either of the sliders to offset the tiling. If it’s seamless, you won’t see any edges appear in the image.
Once the texture is open, go to the Edit menu and choose Define Pattern. Give it a name when prompted and click OK. You can close the pat- tern image.
Step One
› › DOWN AND DIRTY TRICKS
Step Two
Step Three
025
› › kelbyone.com
©Adobe Stock/Mirko Milutinovic
©Adobe Stock/digitalskillet1
©Adobe Stock/digitalskillet1
