
Page 47 - Photoshop User February 2017
P. 47
› › DYNAMIC RANGE
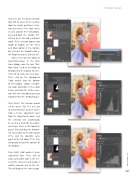
Step Six: Use the Quick Selection tool (W) to select all the red bal- loons by simply painting a selec- tion over them. If the tool selects an area outside the red balloons, press-and-hold the Option (PC: Alt) key to use the tool in Subtract mode. If the selection appears too rough or jagged, use the Select and Mask option in the Options Bar, increase the Smooth slider in the Properties panel, and click OK.
Add a new layer by going to Layer>New>Layer. In the New Layer dialog, name the layer “Bal- loon Color,” and set the Mode to Multiply and the Opacity to 30%. Click OK to create the new layer. Then, click on the Foreground Color swatch near the bottom of the Toolbar, choose a bright- red color (#e01c0b) in the Color Picker, and click OK. Fill the selec- tion with the red color by pressing Option-Delete (PC: Alt-Backspace).
Step Seven: The selection should still be active. (Tip: If it isn’t, go to Select>Reselect to get it back.) Add a Curves adjustment layer from the Adjustments panel, and the selection will automatically be used as a mask for the adjust- ment layer. Then, in the Properties panel, click-and-drag the bottom- left curve point to the right about 25%, and the top-right curve point to the left about 15%. This will greatly increase the contrast of the balloons.
Step Eight: Add another Curves adjustment layer. Then, click to add a curve point right in the cen- ter of the curve line and nudge it slightly upwards and to the left. This will brighten the entire image.
047
› › kelbyone.com
