Page 49 - Photoshop User March 2017
P. 49
MATCHING SATURATION LEVELS
Just as with contrast and luminosity, having two elements in a compos- ite that have vastly different saturation levels can lead to an unrealistic composite. For a visual representation of how much saturation there is in an image, you can create a saturation map, then use a Hue/Saturation adjustment layer to control the saturation of your elements.
Step One: Create a Selective Color adjustment layer (Layer>New Adjust- ment Layer>Selective Color) above your Curves adjustment layer, and name it “Saturation Map.” In the Properties panel, click on the Abso- lute radio button. From the Colors pop-up menu, select Reds, and drag the Cyan, Magenta, and Yellow sliders to the far left, which will result in a value of –100% for each. Go back to the Colors pop-up menu, and repeat this process for the Yellows, Greens, Cyans, Blues, and Magentas.
Step Two: Next, select Whites from the Colors pop-up menu, and move the Black slider to the far right, which will result in a value of +100%. Repeat this step with both the Neutrals and Blacks.
Tip: Once you’ve created your saturation map, save it as a preset (from the Properties panel’s flyout menu) so that you don’t have to make it again the next time you need to use it.
If you’ve successfully created the saturation map, you’ll see a black- and-white image. Anything that’s white is highly saturated, while any- thing that’s black contains no saturation. The different levels of gray represent various levels of saturation.
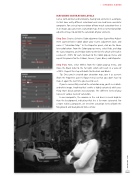
In our composite, the woman in the red dress is much brighter than the background, indicating that she is far more saturated. For a more realistic composite, we need the saturation levels of both the foreground and background to be similar.
› › DYNAMIC RANGE
[049]
> KELBY ONE.COM


