
Page 87 - Photoshop User January 2017
P. 87
You’re learning about composition, color, space, and print. We’ll just add some cool techniques, typography, and a whole lot of fun stuff to get you excited about designing in Photo- shop, as well as retouching.
In future tutorials, we’ll also look at the assets already available in the Cloud: templates, content from Marketplace and Adobe Stock, and Typekit for those with the full Creative Cloud package. That’s enough chat; let’s get working!
MAKING OUR FIRST DOCUMENT
About 80% of what I create ends up printed, whether it’s business stationery, pull-up banners, flyers, posters, leaflets, or info sheets. If you’re designing for print, then you need to learn about bleeds, margins, and guides. Once you learn this, your local print company will love you, which means they may print more quickly and give you better prices!
In this first exercise, we’ll set up a simple document and make an A4 poster for your wall to encourage you to get designing. For this, we’ll need a blank document, an image, and some type. We’ll cover these as we go.
Both Illustrator and InDesign provide the ability to create files that contain bleed marks to assist you when designing your project. Photoshop, though, seems to be missing this feature, but we can still accomplish this with a little bit of understanding and planning.
WHAT IS BLEED?
Bleed is specific to print jobs. You won’t ever hear someone in the video or Web industry ask for a file that contains bleed. When you have a project where the final printed document contains ink that goes to the very edge of the paper, bleed will be required. Most printing presses, both lithographic and digital, can’t print to the edge of a piece of paper. (Some printers can print to the edge of the paper, but the results can be poor.)
To avoid this, the artwork must be printed on a larger piece of paper that includes bleed (the image area extends past the edge of the paper’s final size) and then trimmed to produce the final product. Think of it like coloring outside the lines and then cutting along the lines. If the artwork doesn’t contain any bleed, you run the risk of revealing areas of white (the paper color) along the edge of the printed document, which doesn’t look good and would take a long time to cor- rect manually. If you look to the right of the image at the top of the next column, you can see where the paper was trimmed but missed the edge of the print.
PLANNING AND PREPARATION
The first thing you need to determine is the finished size of the printed document. It’s always better to do this at the start of the project instead of at the end because sometimes you might find you’ve already removed image information that you need to create the bleed. Here in the U.K., we work with the metric system, so we work with A-sized paper, A4 being the closest to Letter (forgive me, I’m useless at working in imperial inches when designing—fractions was never my strong point). The standard bleed in the printing industry for this size is around 3–5 mm, but always check first with your local print company to be sure. Some projects, like books and large artwork (pull-up banners and signage), often need a larger bleed. If in doubt, always ask! Some print companies will supply template files with the bleeds and margins marked for you to work with.
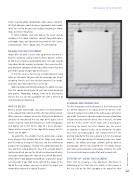
START ME UP—SIZING THE DOCUMENT
We’ll start by creating a new document (File>New) in Photoshop at the final trim size, which in this project is A4. Just click on the Print category at the top of the New
› › DESIGNING IN PHOTOSHOP
087
› › kelbyone.com
