Page 52 - Photoshop User February 2017
P. 52
HOW TO ››
Retouching Magic your checklist for amazing online images
KRISTINA SHERK
There’s nothing more frustrating than looking at an image you took in Photoshop that looks amazing, only to upload it to your website and see completely strange color changes appear. You think to your- self, “It didn’t look like that when I was editing it in Photoshop; why are the colors so wonky now that I’ve uploaded it to the Web?”
Your website is priority one, two, and three when you’re a photographer. It’s your trademark and brand to anyone looking to hire you, and it’s essential that the images that represent your business on your website look perfect. Here are my top three tips to make your images appear in a league of their own once they’re uploaded to your website.
1. SHARPENING
It’s quite a wild time in the world of computer screen resolu- tion. Since the debut of the Apple Retina Display and the more recent 4K monitors and the adoption of UHD (ultra- high definition), the race to more pixels is well under way. That’s why it’s important for you as a photographer to be well-educated on your website provider’s default image set- tings. This information is hugely important when uploading your images to your website. You’ll want to make sure that you’re manually sizing and cropping your images to your website’s specifications and not checking the box, which resizes your images automatically upon upload.
After sizing your images in Adobe Photoshop or Light- room to the correct dimensions and dpi (dots per inch), it’s time to sharpen. Here’s your dinner-party factoid: The Unsharp Mask tool in Photoshop hasn’t been updated since
Photoshop version 1! Needless to say, while I do use Photo- shop to selectively sharpen certain areas of my images, for your overall Web image sharpening, I’d rely on the much newer algorithm behind Adobe Camera Raw’s (ACR) or Lightroom’s Sharpening sliders in the Detail panel.
Since your images have already been resized to Web dimensions, in Lightroom tap your Z key to zoom your entire image to 100%, rather than using your detail preview box located in the Detail side panel. Make sure your zoom set- ting is set to 1:1 to ensure that you’re looking at a true 100% zoom. In ACR, press Option-Command-0 (PC: Alt-Ctrl-0) to zoom in to 100%.
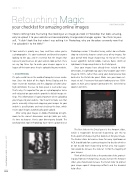
The first slider in the Detail panel is the Amount slider, which is responsible for overall sharpening. Use this to find a point of sharpening that looks best for your image. The Radius slider determines how far away Lightroom or ACR should look for a contrasting pixel to decide whether or not to add more sharpening to that area. My sugges- tion would be to leave the slider at 1.0 for the majority of your images.
Think of the Detail slider as the protection slider, protect- ing you from over-sharpening. As you increase the Amount slider, you should also increase the Detail slider to protect your image against sharpening artifacts and the dreaded halo effect.
052
› › photoshop user › february 2017


