
Page 79 - Photoshop User December 2016
P. 79
HUGE THUMBNAILS IN THE LAYERS PANEL
When you’re working in the Layers panel, the layer thumb- nails show you the layers’ contents. Did you know that you could change the size of the thumbnails? Click on the Layer panel’s flyout menu at the top right and choose Panel Options. This is where you can choose a different-sized thumbnail. This is also where you control other things such as automatically adding a layer mask to fill layers.
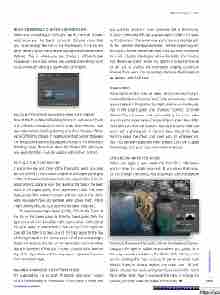
MAKE DIFFERENCE CLOUDS MORE DIFFERENT
One of the foundational building blocks of textures is Clouds and Difference Clouds (both found under Filter>Render). You can make almost anything starting with these textures. When using Difference Clouds, it creates a contrast pattern between the Foreground and the Background colors in the Difference blending mode. If you hold down the Option (PC: Alt) key as you apply the filter, it will be applied with higher contrast.
PUT ALL THE TEXT ON TOP
If you’re like me and many other Photoshop users, you may get so involved in the creation stage that the Layers panel gets a little cluttered and disorganized. One organizational tip for designers is to place all your text layers at the top of the layer stack in the Layers panel, and maybe even inside their own layer group. This makes it easy to edit the text in one place. Also, you won’t have any blended layers above them, which might slightly obscure your type without your realizing it.
To organize your type layers quickly, click on the T icon at the top of the Layers panel to Filter for Type Layers. Only the type layers will now be visible in the Layers panel. Shift-click all the type layers to select them. Click on the T icon again to turn off the filter and drag one of the type layers to the top of the layer stack in the Layers panel. All of the selected type layers will snap to the top of the layer stack with no other layers in between. If they don’t move, create a blank layer on top of the layer stack and then try again, hopscotching over that new blank layer.
MAKING ANIMATED GIFS FROM VIDEO
I’m surprised by the number of people who aren’t aware of this functionality in Photoshop. If you have a video and ALL IMAGES BY COLIN SMITH
you want to convert it to an animated GIF in Photoshop, it’s easy! (How did GIFs get popular again?) Open the video in Photoshop in the same way you’d open a photograph. In the Timeline (Window>Timeline), set the beginning and end points for the part of the video that you want to convert to a GIF. Choose File>Export>Save For Web. You’ll notice that there’s an option at the top right to change the format to GIF. Do it! Change the Animation Looping Options to Forever if you want it to be endless, decrease the Image Size as needed, and click Save.
RAW VIDEO
Since we’re on the topic of video, did you know that you could edit video in Camera Raw? First, convert your video to a smart object in Photoshop by Right-clicking on the thumb- nail in the Layers panel and choosing Convert to Smart Object. This will ensure that you’re editing the entire video and not just a single frame. Choose Filter>Camera Raw Filter. Now you can edit the video in exactly the same way that you’d edit a photograph in Camera Raw. Use all the basic tools to make the colors and tones pop, or whatever you like. You can even apply and make presets. Click OK to apply the changes and your video now looks amazing!
CREATE AN INVERTED MASK
When you apply a layer mask and then fill it with black, you’re filling the visible area only. If you move that mask, or you enlarge the canvas, you’re going to see the edges of
the mask. If you want to work with an inverted mask (every-
thing on the layer is hidden except where you paint), do it
this way instead: Hold down the Option (PC: Alt) key when
you’re creating the mask and you’ll get an inverted mask
(black). If you’ve already created the mask, don’t fill with
black; choose the mask and press Command-I (PC: Ctrl-I)
for a better result. Now if you move the mask or enlarge the
canvas, you won’t see the edges of the mask. ■ 079
CLICK TO RATE
› › PHOTOSHOP TIPS
› › kelbyone.com
