Page 76 - Photoshop User December 2016
P. 76
HOW TO ››
to the duplicate, then name the layer. Next, create the snap- shot and give it the same name as the layer. This way you’ll always know which layer you can paint using that snapshot. Here, I used a Gaussian Blur filter on my duplicate, then used a Curves adjustment (Command-M [PC: Ctrl-M]) to increase contrast. In this case, I named both the Layer and the snapshot “Blur.”
Tool Presets
To make things easy, with the AHB active, open the Tool Presets panel (Window>Tool Presets) and click in the little sandwich menu in the upper right. From there you can load the Art History Brush presets and get some really nice starting setups. Of course, you could use any avail- able brush tip, but stay away from Bristle brushes because they’re unpredictable. If you have a Wacom tablet, you can even adjust things such as rotation and size jitter for more variation.
I like to work from general to specific, and painting usu- ally starts with large areas of loose color. Choose Oil Sketch in the Tool Presets panel, and in the History panel, select the Blur snapshot (remember not to click the snapshot, just the source checkbox), then click on the Blur layer to make it active. Start painting on the canvas and don’t worry about precision. Just fill up the canvas! You may want to increase
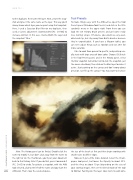
Note: The History panel can be finicky! Double-click the name to modify it, but don’t click away from the name to the right or on the thumbnail—you’ll put your document back to that history state! If you do that, press Command-Z (PC: Ctrl-Z) to undo. To activate a snapshot, with the AHB tool selected, click to the left of the name and you’ll get the
076 AHB icon. That’s now the selected source.
the size of the brush at first and then begin working with smaller sizes to define edges.
Now we’ll get a little more detailed. Select the Cham- pagne tool preset, but lower the Opacity to about 25% and the Area to about 10 px (depending on the size of your starting image), then set the blend mode of the tool to Normal. Painting on this layer now starts to add some
› › photoshop user › december 2016


