
Page 20 - Lightroom Magazine Issue 26
P. 20
› › lightroom magazine › ›
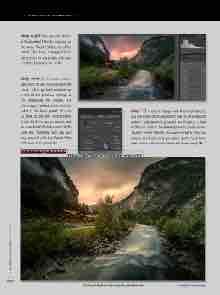
step eight: You can add anoth- er Graduated Filter by clicking on the word “New” at the top of the panel. This time, I dragged from the bottom of the photo and low- ered the Exposure to –1.02.
step nine: At this point, take a step back to see how you like the result. I often go back and change a few of the previous settings as I’m processing my images. For this image, I added some Contrast (+34) in the Basic panel. You can go back to the Split Toning panel if you think it’s too unnatural, and you can lower the Saturation of the blue and magenta. You can also play around with the Radial Filter and make it to your taste.
CLICK TO RATE
step 10: If you’re happy with the final retouch, you can make it into a preset to use on other photos taken in bad weather. Just click on the plus (+) icon at the top right of the Preset panel to create a new Develop preset. Presets are always great to give you a base, and it can bring you places you’d never have been without this look! Here’s the final image. ■
020
Click-and-hold on the image for a before view ALL IMAGES BY SERGE RAMELLI
› › lightroom magazine › issue 26
