
Page 40 - Lightroom Magazine Issue 25
P. 40
› › lightroom magazine › ›
Question&s Answers
SCOTT KELBY
I know there’s a shortcut for just about everything in Lightroom, so is there one for moving through the different sliders in the Develop module?
There sure is—it’s the Period key (.) on your keyboard. Each time you press it, it moves down to the next slider. The name of the active slider will turn white. Press the Comma key (,) to move up through the sliders. When you stop at a particular slider, you can increase or decrease the amount of that slider using the Plus (+) or Minus (–) keys, respectively, on your keyboard.
The buttons in the Library’s Quick Develop panel seem to move too much when I click on them—even the single-arrow button moves more than I want it to sometimes. If I want smaller adjustments, do I have to switch to the Develop module?
Actually, there’s kind of a hidden way to get finer adjustments out of those single-arrow buttons in Quick Develop. Just hold the Shift key before you click the but- ton, and it cuts the amount of the adjustment in half so you get finer control.
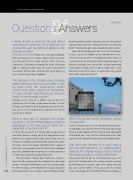
What is that grid of squares that shows up when I use the White Balance Selector eyedropper in the Basic panel? What am I supposed to be doing with it?
It’s there to help you find a neutral color so you can set your white balance. Ideally, you’d find something in your photo that’s supposed to be light gray (if you want to nerd-out, it would be something that’s exactly 18% gray). Of course, there’s not always something that’s supposed to be gray in every photo, so in the absence of an obvious gray area, I look for something that’s a neutral color, like a tan or beige, or something along those lines.
That grid you’re talking about (called the Loupe) is there to help by giving you the reading of the pixel your cursor is currently hovering over, and if it’s a neutral color, the three readings at the bottom of the Loupe should be
040 pretty close to the same number. (Don’t hold your breath
on getting all three to be exactly the same.) In the example shown below, where the readings are R:50.7, G:50.9, and B:49.5, that’s pretty darn close enough to call it neutral.
Now, all that being said, I don’t ever use that Loupe. In fact, I go to the Toolbar at the bottom of the pre- view area and turn off the checkbox for Show Loupe so I never have to see that awful, distracting thing again. To find a neutral spot, here’s what I do: I click on something I think looks neutral, and if it doesn’t look right, I click somewhere else until it does. It usually takes just two or three clicks. Don’t overthink it.
What’s the quickest way to straighten a photo in Lightroom?
I think it’s to press the letter R. No matter where you are in Lightroom, pressing the letter R will jump your image to the Develop module with the Crop Overlay tool already activated for you. Then, click the Auto button in the Crop panel (near the top of the right-side panels). Boom! Done.
Last issue you showed us a quick way to find out which photos in our catalogs aren’t linked to the original images. Once I find all the missing photos, how do I relink them? Okay, here’s what to do: As I mentioned last issue, first go to the Catalog panel in the Library module and click on All Photos so it searches your entire library (and not just your current folder). Then, go under the Library menu and choose Find All Missing Photos to display all
› › lightroom magazine › issue 25
