
Page 31 - Photoshop User February 2017
P. 31
› › DOWN AND DIRTY TRICKS
Step 24
Step 25
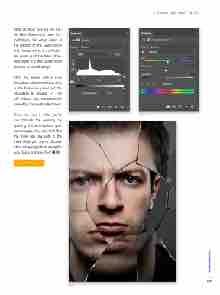
Step 24: Now click on the Cre- ate New Adjustment Layer icon (half-black, half-white circle) at the bottom of the Layers panel and choose Levels. In the Proper- ties panel, push the black (shad- ows) slider in a little to add more contrast to overall design.
Step 25: Finally, add a Hue/ Saturation adjustment layer and, in the Properties panel, set the Saturation to around –7. This will reduce any oversaturation caused by the Levels adjustment.
There you have it. After you’ve run through the exercise, try applying this technique to your own images. You may find that the more you play with it, the more likely you are to discover other intriguing effects along the way. Enjoy and have fun! n
Discuss this Issue
Final
031
› › kelbyone.com
