
Page 70 - Photoshop User December 2016
P. 70
HOW TO ››
Step Five
Step Five: With that done (and you’re doing it for your photographs, not some specific number), I headed to the Saturation tab to deepen specific colors and remove the influ- ence of a bad color. Look at the Blues slider. I desaturated it. Why? The scene has enough cold, so I wanted to bring it down a notch, which warmed up the other colors. Also, all of the other adjustments that I had made up to this point had made the blue sky look like something from a bad HDR. Skies don’t look like that, so that one slider took care of both warming the photo and fixing the sky in one fell swoop.
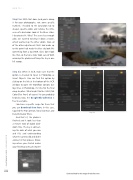
Step Six: When in ACR, make sure that the option is checked to Open in Photoshop as Smart Objects. You can find this option by clicking on the link at the bottom of the ACR window to open the Workflow Options dia- log. Once in Photoshop, it’s time for the final coup de grâce. What might that be? Well, Nik Color Efex Pro 4, of course! As you probably know by now, the Google Nik Collection is free to everyone.
I do have a specific recipe for these that you can download from here. In this case, I applied the Pro Contrast, Tonal Contrast, and Detail Extractor filters.
And that’s it, the photo is finished and it took less than a minute total of digital dark- room time. The key is connect- ing the dots of what you saw and felt, and understanding what the camera did and didn’t connect in that process. Know- ing where you started makes your finishing so much simpler!
Step Six
070
Click-and-hold on the image for a before view
› › photoshop user › december 2016
