
Page 50 - Lightroom Magazine Issue 28
P. 50
› › lightroom magazine › ›
modifier, it also creates a cooler-toned, crisper light, and increases the efficiency of the strobe’s output. Because of this, in many cases, you can get away with a lower-powered strobe for the key light and still achieve excellent results. In many cases, I’ve been able to get away with a 500-watt second strobe and done just fine.
Size is also a key factor when you’re selecting a modifier intended to create contrast. In this case, smaller sources are preferable. Distance is another important consideration— the further away the light and modifier combination is placed, the harder and more contrasty the light produced will be. The tried-and-true lighting maxims apply here—the smaller the source and the further away it is, the harder the light; the larger the source and closer it is, the softer the light.
The depth of the modifier you’re selecting is important, as well. A couple of my favorite modifiers for black-and-white fashion and portrait work are the Mola Sollo beauty dish and Elinchrom’s Deep Octa (large or small). Both are deep, almost conically shaped modifiers that increase contrast, have dramatic fall-off, and create lovely, crispy light that’s perfect for black-and-white images.
So for the looks in this article, you’ll want modifiers on the smaller size, with silver interiors, ideally deeper than not, and moderate-to-long distances between your light and subject.
directional vs. flat lighting
No lighting article worth its salt would be complete without a discussion of directional light vs. flat light. This subject could easily occupy an entire article by itself, and perhaps I’ll write one, but for now, suffice it to say, I’m a fan of direc- tional lighting. The more direction you give to your lights, in relationship to your subject, the more shadows and contrast you introduce to the lighting. Directional lighting also creates a more volumetric and dimensional appearance than flat lighting. If you’ve been lighting everything from the same direction as your camera position, you’re poten- tially doing yourself a disservice in the drama department. Try moving your key light 45o to the left or right of your subject. You’ll see a dramatic difference that I’m betting you’ll love as much as I do.
As mentioned above with directional lighting, you’ll have more shadows on the side of the face opposite the key light. These can easily be modulated using a large reflector or a piece of foam core. The same guidelines apply here with
respect to surface reflectivity. Use white for softer, lower- contrast fill light, or silver for a punchier, more specular look. Controlling the amount of fill light introduced is simply a matter of increasing or decreasing the distance between the reflector and the key light being used.
Please note, I’ve confined my discussion to the studio, as those are the examples featured here; however, the same guidelines apply when shooting on location.
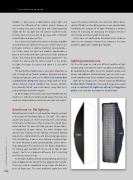
lighting scenario one
On the next page are two very different qualities of light created using essentially the same two lights and modifiers. By repositioning the lights, as per the diagrams below each image, and adding or subtracting grids, you can create a vari- ety of complimentary effects without having to switch tools.
Both of the images were created using two Elinchrom Rotalux 14x35" strip boxes. The second image was created using an additional 30o Lighttools ez[Pop] Soft Egg Crate grid on each strip box to narrow the beam of light.
050
› › lightroom magazine › issue 28
